While credit cards and online payment apps have become the norm in today’s fast-paced, digital world, there’s still a place for traditional, paper checks.
Checks offer a sense of privacy, cost-effectiveness, and familiarity that digital payments sometimes lack. That’s why it’s crucial to understand how to fill out a check correctly.
In this article, we’ll guide you through the process of correctly filling out a check. By following this step-by-step guide, you’ll not only learn the proper way to fill out a check but also discover some important safety tips to keep in mind.
Understanding a Personal Check
Knowing the key parts of a cheque is essential for ensuring secure transactions, preventing fraud, and communicating effectively with your bank.
- Payee Line: Located next to “Pay to the Order of”, this is one of the most important parts of the check as it designates who can receive the money.
- Date Line: Located in the top right-hand corner, this serves as a timestamp for the check.
- Dollar Box: This is a small box on the right side of the check where you write the amount of the check in numerical format.
- Dollars Line: This is the line below the “Pay to the Order of” line. Here, you write out the same amount you wrote in the dollar box, but this time in words.
- Signature Line: Found at the bottom right corner of the check, your signature authorizes the bank to pull these funds from your bank account.
- Memo Line: Located at the bottom left of the check, this is a space for any notes about the purpose of the check. In some bank’s checks, ‘Memo’ is printed as ‘For’.

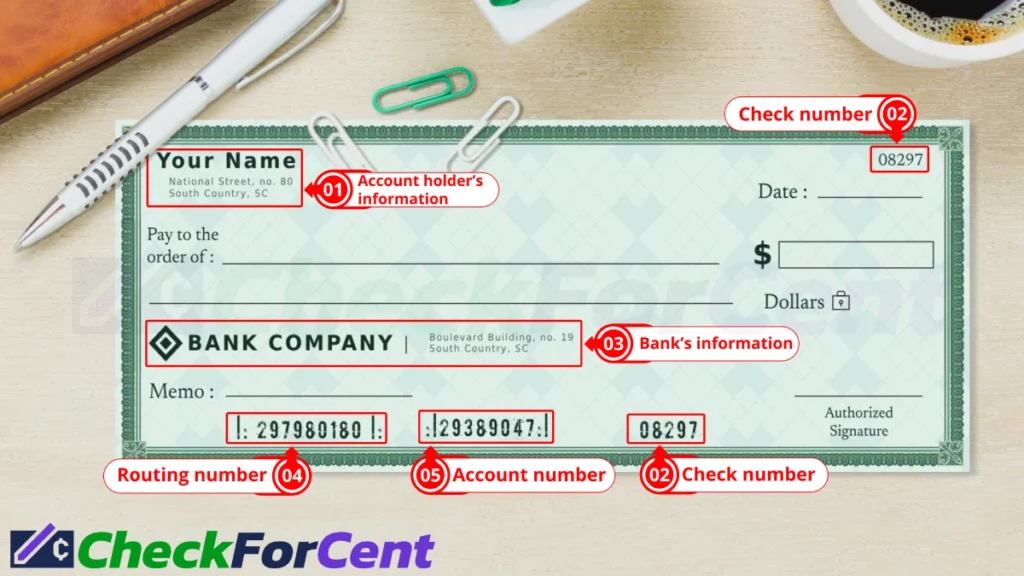
The check contains several other elements that are pre-printed and unique to each check. At the top of the check, you’ll find the account holder’s information, which includes the name and address. Each check also has a unique check number located at the top right to keep track of the checks you issue. The bank’s contact information and logo are usually printed somewhere on the check, which helps identify the issuing bank. At the bottom of the check, you’ll find the bank’s American Bankers Association (ABA) routing number, which identifies the bank, and your specific account.
Now that we’ve covered the basics of a check, let’s learn how to fill out a check in the correct order, from top to bottom.
Quick and Easy Steps to Write a Personal Check
Follow these easy steps to write a personal check of any amount with ease:
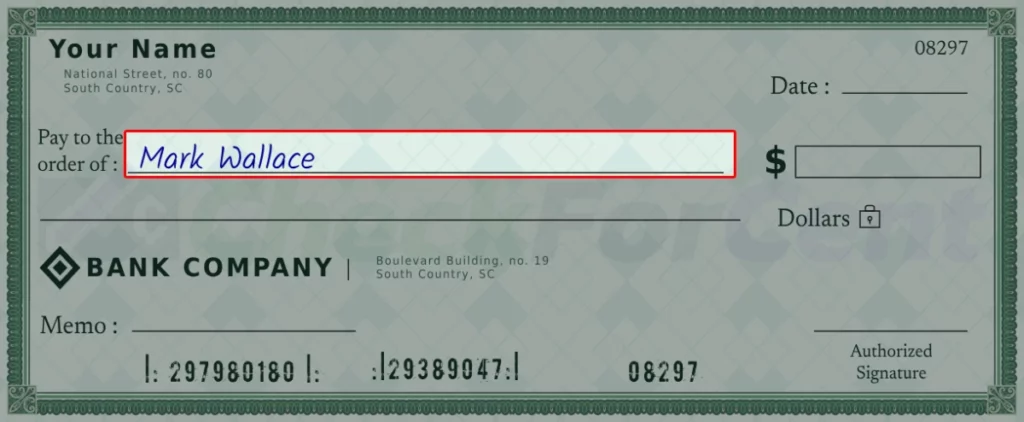
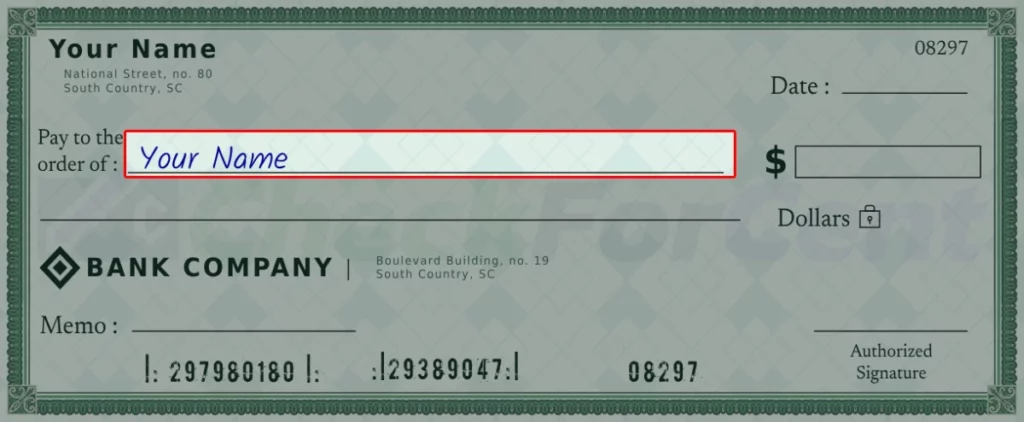
Step 1: Fill Out the Recipient’s Name
The first step is to fill out the line next to “Pay to the Order of”. Here write the full name of the payee or recipient. This can be an individual’s full name (for example Mark Wallace), or it can be the name of an organization. Make sure you spell the full name correctly.
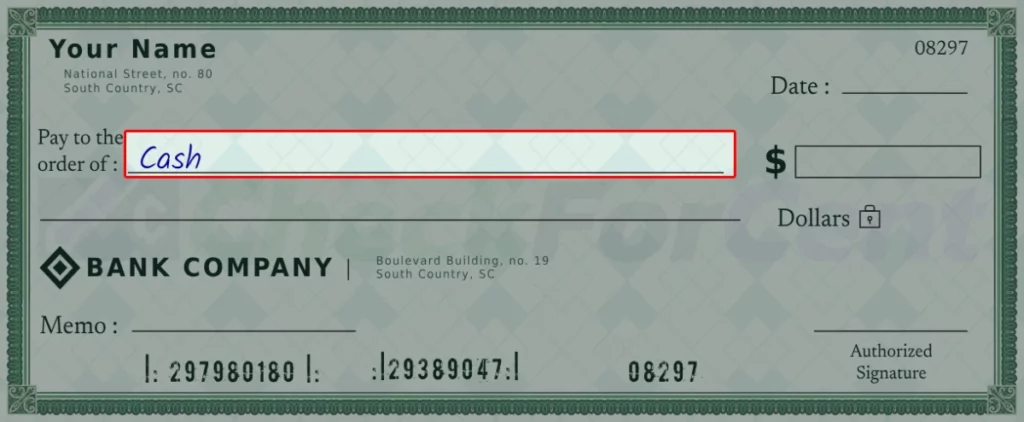
If you want to cash the check or you don’t know the exact payee’s name, then you can just write the word “Cash” as the recipient’s name. But remember, writing cash means that anyone can cash the check. Try not to write ‘Cash’ as payee unless you really have to. It’s safer that way.
If you need to withdraw funds or move money between your accounts, you have the option to write your own name on the ‘Pay to the Order of’ line.
Step 2: Write the Date
Then, Write the date in the top right hand-corner. You can write the current date or a date in the future. A check is usually good for three to six months from the date on it, depending on your bank. After this time, it becomes stale and the bank might not accept it.
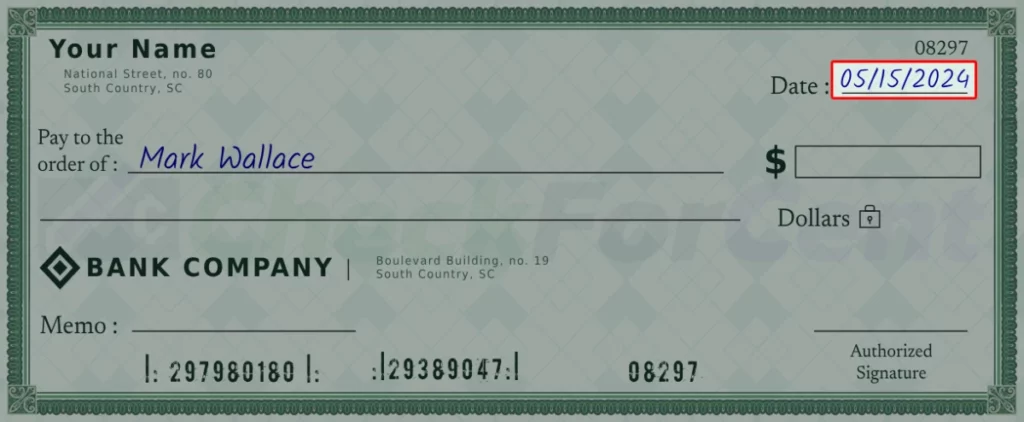
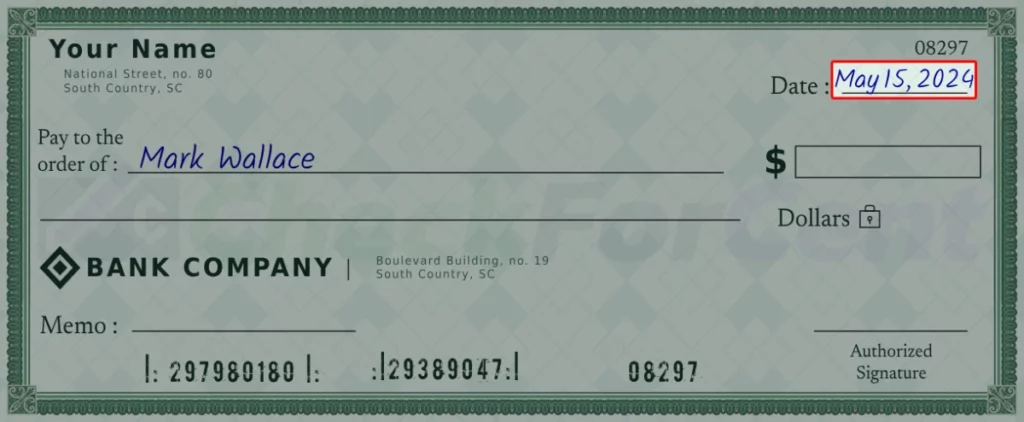
Ensure the date is written in the MM.DD.YYYY format, such as ‘05.15.2024’. Alternatively, you can write it out, like ‘May 15, 2024’.
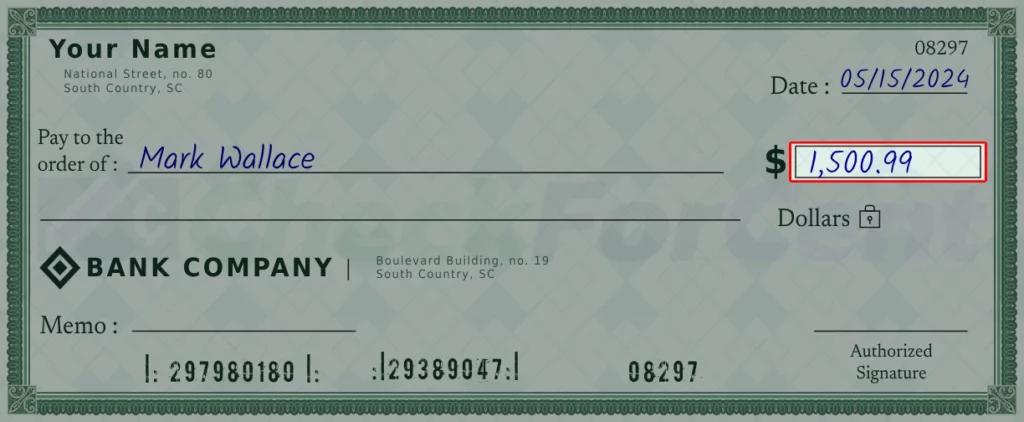
Step 3: Write the Payment Amount in Numbers
In the dollar sign box, write the full amount of your check. Use only numbers and fill out the exact amount in dollars and cents. For example, if you are paying 134 dollars and 39 cents, you have to write ‘134.39’. Don’t forget to add a period between the dollars and the cents
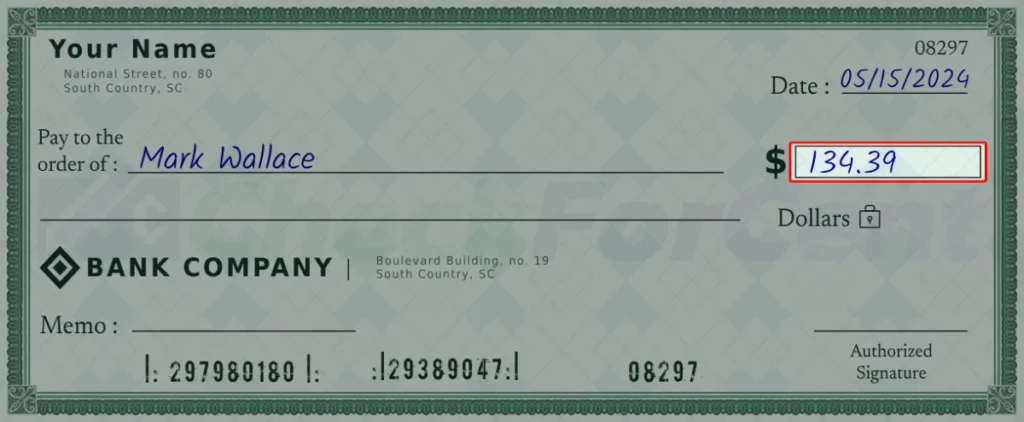
Remember to include a comma for amounts exceeding a thousand, like ‘1,500.99’.
Note: The payment amount should not be more than the funds you have in your checking account. Otherwise, when the recipient tries to deposit your check, the bank will not cash or deposit the check. And your bank may charge you a fee for insufficient funds.
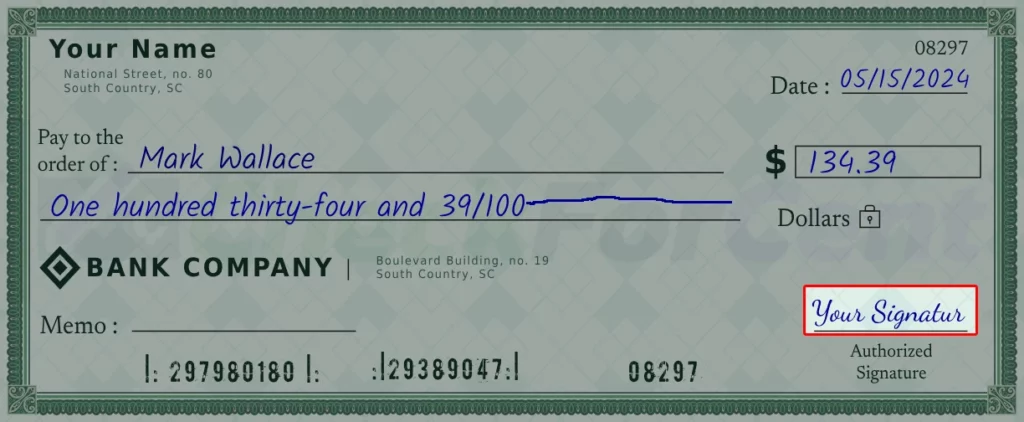
Step 4: Write the Payment Amount in Words
Below the “Pay to the order of” you will see a blank line, this is where you write the amount in words. For any cents, write them as a fraction over one hundred for example “One hundred thirty-four and 39/100”.

For amounts without cents, simply write the dollar figure followed by “and 00/100”. For instance, an amount of $50 should be written as “Fifty and 00/100”.

For your convenience, here is a tool to help you get the correct spelling and format for any amount.
If there is excess space after writing the amount on your check, draw a horizontal line all the way across to the end of the line. This ensures no additional changes can be made to the amount you’ve written.

Step 5: Sign the Check
Now, Sign your name on the line at the bottom right corner of the check. Without your signature, a bank will not allow the recipient to deposit or cash the check.
Note: Your signature must match the sample signature you submit to the bank when you open your account.
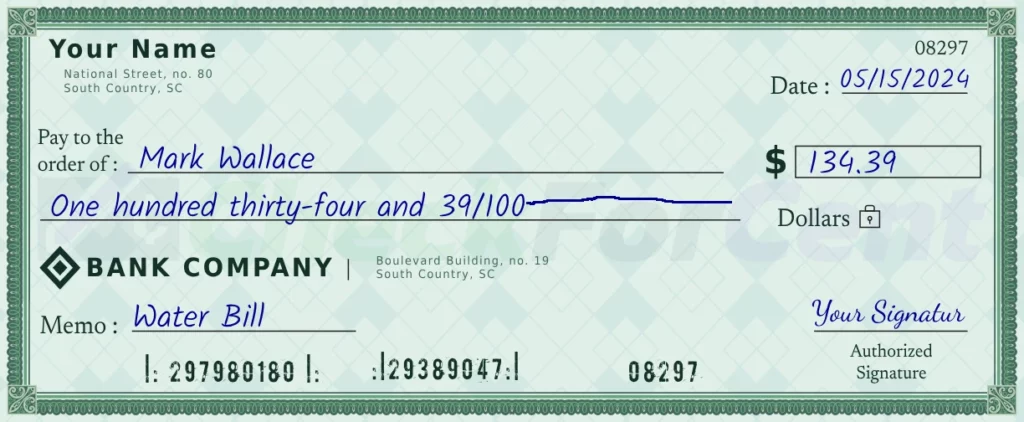
Step 6: Fill Out the Memo Line
The last thing you need to do is fill out the memo section on the bottom left of the check. This step is optional and it will not affect your check validation. It’s usually helpful to write a note to remind you later what this check was for. For example, Water Bill, Donation, House Rent etcetera.

Complete Sample Check
Upon completing these steps, your check should resemble the following:
General Safety Measures for Writing a Check Correctly
- Ensure all spellings are correct.
- Ensure the check amount doesn’t exceed your account balance to avoid bank rejection and potential fees.
- Don’t make alterations or overwrite because your check can be dishonored.
- Ensure the amount in words and figures match.
- Keep your checks safe from fraud; don’t leave extra spaces between words and figures. Always draw a line through any unused space so that it cannot be misused.
- Ensure your signature matches the signature you provided to the bank.
- Do not write, fold, mark, or pin on the code band of the check. This code band character recognition system helps banks identify and validate the authenticity of the cheque electronically.
- Record all the details of the checks issued. You may need this information later.
Thank you for reading this guide on how to fill out a personal check. We hope now you know “how to fill out a check”. For any related queries please comment below.